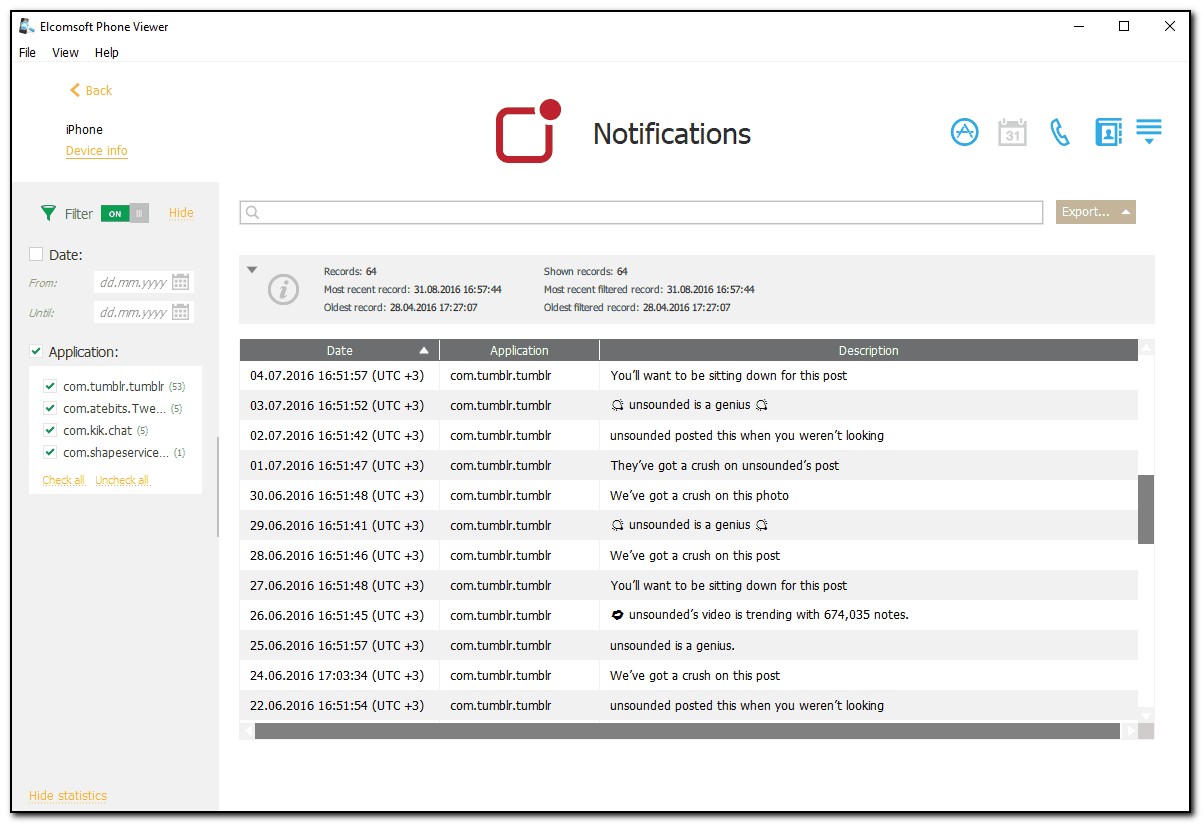
This plugin allows you to explore the user's push notifications that are used for applications to inform about different types of updates.
NOTE: This plugin is only available for iOS 7.x.x - 10.x.x backups of the following types: iCloud and iTunes (encrypted, not encrypted, and backups with restored file names).
You can view the following information received in notifications:
•Date and time (including the time zone) when the notification was received
•Application from which the notification was sent
•Description which contains the notification text
NOTE: If the notification text is long and does not fit the screen, it ends with "...". To view the full notification text, hover the mouse over the notification and full text will be displayed as a prompt.
All notifications are displayed in a grid. The most recent notifications are displayed on top.
The general information about notifications is displayed above the grid:
•Records: total number of notifications
•Most recent record: date and time when the most recent notification was received
•Oldest record: date and time when the oldest notification was received
If the filtering is on, you can also view the statistic information on the filtered notifications:
•Shown records: number of notifications that match the filtering criteria.
•Most recent filtered record: date and time of when the most recent notification (among the filtered records) was received
•Oldest filtered record: date and time when the oldest notification (among the filtered records) was received
To sort the notifications in the grid, click the necessary column header.

Searching and Filtering
You can search for notifications by the application name and description.
To perform searches in Notifications, enter the search request in the search field and press Enter. The search results will be highlighted in yellow. The number of search results will be displayed in the search field.

You can filter notifications by dates and applications.
To filter the notifications, open the Filter pane by clicking the ![]() icon on the left.
icon on the left.
Enable filtering by switching the On/Off toggle, and define the filtering options:
•Date: filters the notifications by date. Select the Date check box and then select the From and Until dates in the calendar fields.
•Application: filters the notifications by applications. Select the Application check box and then select the check boxes for the necessary application names.
If you clear any check box for an application name, a negative number will be displayed next to the Application filter. This number indicates the number of records that are currently not displayed.
Exporting Notifications
To export notifications, do the following:
1.Click Export.
2.Select one of the following values from the drop-down list: Filtered or All.
3.The Select destination file window will open.
4.In the opened window, select the location in which the file with exported notifications will be saved, enter the file name and select the file extension (.txt or .xlsx).
5.Click Save.
6.The file is saved in the selected location.
When the file has .txt extension, it is exported in .csv format. To open the file in Excel, right-click it and then select Excel from the Open with menu.